A brake pad gauge is the small tool that turns a worried guess about your brakes into a number you can trust, because it measures the friction material that actually stops your car. Pads wear a fraction of a millimeter at a time, so the change is invisible from week to week, and by the time a brake squeals or grinds you may already be past the safe line. A gauge tells you exactly how much material is left in millimeters, which is the only honest way to decide whether to keep driving or book a replacement.
This guide from the BrakeTireGuide team, led by our brakes lead Rohan Pettis, explains what a brake pad gauge is, the different tools you can use, how pad thickness is read in millimeters, and where the keep-or-replace lines fall. This article is educational and is not a substitute for a qualified brake technician or a hands-on inspection. Brakes are a safety system, so always follow your vehicle manufacturer specifications, and when a reading looks marginal or you see damage, have a professional confirm it before you drive on.
By Rohan Pettis, brakes lead at BrakeTireGuide. Last reviewed July 7, 2026.
Short answer: new pads carry about 10 mm to 12 mm of friction material. Many carmakers set the replacement line near 3 mm to 4 mm, and roughly 2 mm is treated as the bare minimum. If your gauge shows 3 mm or less, plan to replace the pads soon rather than waiting for the metal-on-metal grind.
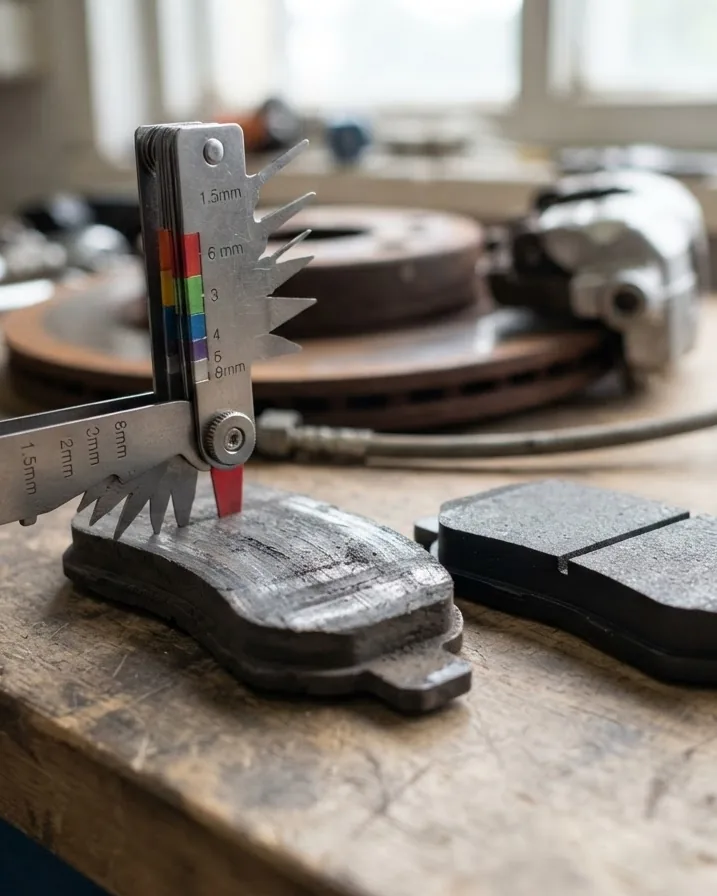
What a brake pad gauge is and why it matters
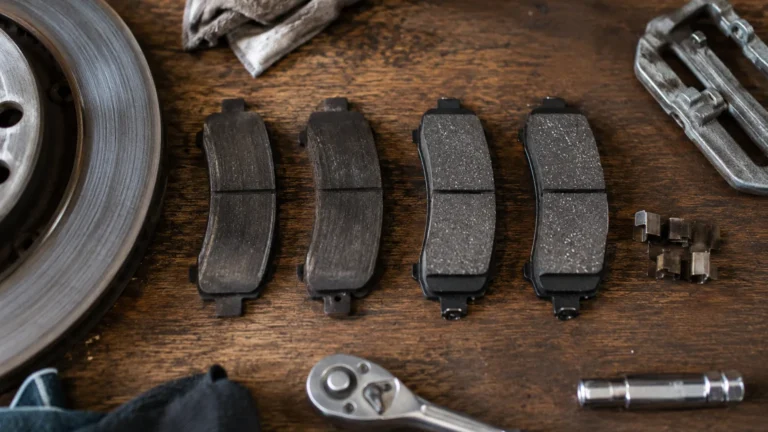
A brake pad gauge is a measuring tool that tells you how much friction material is left on a brake pad. That friction material is the thick block bonded to a steel backing plate. When you press the brake, the caliper squeezes the pad against the spinning rotor, and the friction material is what wears away to create the grip that slows the car. As it wears, the block gets thinner, and eventually there is not enough of it to stop safely.
The reason a gauge matters is that pad wear is gradual and hidden behind the wheel. A pad loses material slowly over thousands of miles, so you cannot feel the difference between a healthy pad and a nearly worn one until the last moment. Measuring turns a vague sense that the brakes “feel a little soft” into a specific number you can compare against the manufacturer minimum. If you want the full inspection routine that goes with a gauge, our walkthrough on how to check brake pads covers the steps from wheel to caliper.
There is one mistake that ruins most home measurements, and it is worth stating up front: you measure only the friction material, never the steel backing plate behind it. The backing plate does not stop the car, so including it in your reading makes a worn pad look far healthier than it is. Every method in this guide comes back to that single rule, because a brake pad gauge is only as good as the surface you point it at.
Types of brake pad gauges and measuring tools
The phrase brake pad gauge covers a few different tools, and the right one depends on how precise you need to be and whether the pad is on or off the car. Here are the main options you will run into.
- Dedicated feeler or go-no-go gauges. These are purpose-built for brake pads, often a set of blades or a stepped tool that either reads the remaining material or flags a simple pass or fail against a minimum such as 3 mm. They are cheap, fast, and made for the job, which makes them handy for a quick monthly check.
- Digital calipers. A digital caliper has jaws and an LCD screen that shows an exact reading, usually to a resolution near 0.01 mm, and can switch between millimeters and inches. It is the easiest way to get a precise number on a pad you have removed from the car. Expect to pay roughly $15 to $40.
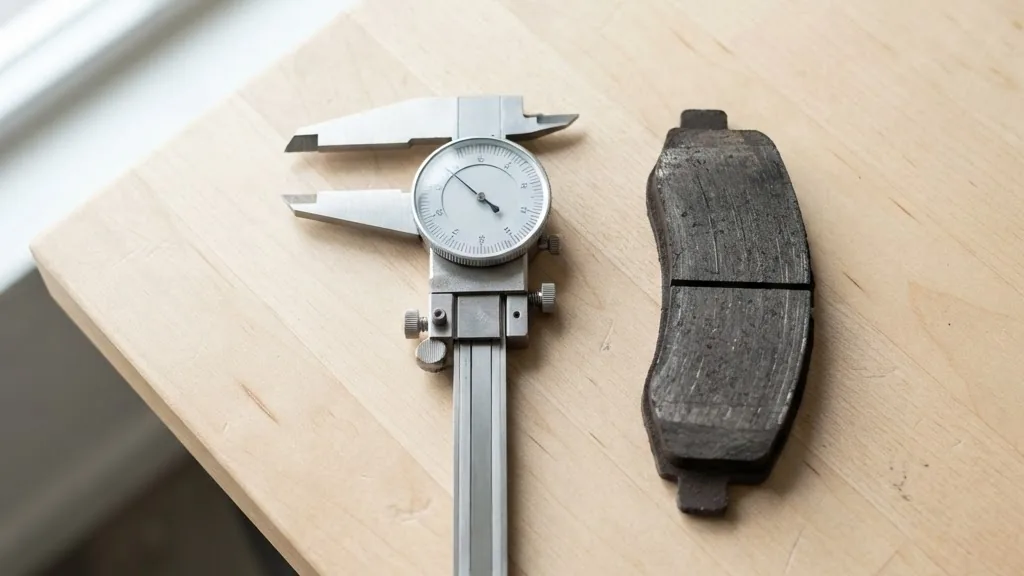
- Dial or vernier calipers. These read on a mechanical scale rather than a screen, so they need no battery, and they are accurate and durable. Many technicians keep one because it survives a busy shop and never runs flat.
- Micrometers. A micrometer gives the highest precision of all, reading to hundredths of a millimeter, and it is the tool a shop reaches for when a specification is tight. It is more than most drivers need, but it is the gold standard for accuracy.
- Stick or probe gauges and the molded wear slot. The simplest reading of all can come from the pad itself. Many pads have a molded slot in the friction face that acts as a built-in wear marker, and once the surrounding material wears down to the bottom of that slot, the pad is near the end of its life.
The table below compares the common tools side by side so you can match the gauge to how precise you need to be and what you are willing to spend.
| Gauge type | Typical precision | Rough cost | Battery | Best for |
|---|---|---|---|---|
| Feeler / go-no-go gauge | Pass-fail at a set line (e.g. 3 mm) | $5 to $15 | No | Fast monthly checks, wheel on |
| Digital caliper | About 0.01 mm | $15 to $40 | Yes | Exact reading on a removed pad |
| Dial / vernier caliper | About 0.1 mm | $20 to $50 | No | Shop use, no battery to die |
| Micrometer | About 0.001 mm | $30 to $120 | No | Tight specs, maximum accuracy |
| Molded wear slot | Rough end-of-life marker | Free (built in) | No | Quick visual triage |
For most drivers, a low-cost digital caliper plus a dedicated feeler gauge is the sweet spot. The caliper gives you an exact millimeter reading when a pad is off the car, and the feeler gauge lets you do a fast pass-or-fail check without pulling anything apart. Whichever you pick, the tool has to reach the friction material and read it alone, which is where the different types really differ in the field.
How brake pad thickness is measured in millimeters
Brake pad thickness is measured in millimeters, and the number you want is the height of the friction material from the backing plate to the face that touches the rotor. A new passenger-car pad usually carries about 10 mm to 12 mm of that material. In rough inch terms, 10 mm is a little under 3/8 inch, and the 3 mm replacement line is about 1/8 inch, but the whole trade works in millimeters, so a gauge that reads mm keeps you from converting in your head.
Because pads rarely wear evenly, one reading is not enough. Caliper drag, a slightly warped rotor, or normal use can leave a pad thicker at one end than the other. The fix is to measure at the top, the middle, and the bottom of the pad and then use the thinnest of the three as your real number. The most-worn point is what decides when the pad is unsafe, no matter how healthy the rest looks.
A quick sanity check helps when you have no gauge in hand. Three millimeters of friction material is about the thickness of two U.S. pennies stacked together, since a penny is roughly 1.5 mm thick. That trick will not replace a real reading, but it gives you a feel for how little material 3 mm actually is, and how close that is to nothing.
Brake pad thickness chart: reading to action
The table below maps a gauge reading to the pad condition and what the BrakeTireGuide team suggests you do about it. Treat it as a general guide; your vehicle maker specification is the final word, and some performance or heavy vehicles set different numbers.
| Reading (friction material) | Approx. wear | Condition | Recommended action |
|---|---|---|---|
| 10 to 12 mm | New | Full material | Nothing needed; measure a few times a year |
| 6 to 9 mm | About 25 to 40 percent worn | Healthy | Good to go; keep an eye on it |
| 4 to 5 mm | About half worn | Watch closely | Start planning; note any noise or pulling |
| 3 mm | About 75 percent worn | Replace soon | Book a replacement; the wear tab may start to squeal |
| 2 mm | Near end of life | Unsafe | Replace now; little safety margin left |
| Under 2 mm or metal showing | Worn out | Dangerous | Do not drive on it; risk of rotor damage and long stops |
Notice how much of the useful life sits above the replacement line. The gap between 4 mm and 2 mm is small on the gauge but large on the road, which is exactly why the “replace soon” guidance and the “bare minimum” number do not land on the same figure.
Safety warning: Once a reading drops under 2 mm or you see bare steel, stop driving the car. At that point the backing plate can contact the rotor, stopping distances grow, and a routine pad job turns into a pad-and-rotor job. Have it towed or inspected before your next trip.
New pad thickness versus the replacement line
Understanding the two ends of the range makes every reading easier to interpret. At the fresh end, a new pad gives you roughly 10 mm to 12 mm of friction material to work with. That is your full budget, and it is the number every later reading is measured against.
At the worn end, most carmakers and technicians treat somewhere around 3 mm to 4 mm as the point to replace, which is roughly 75 percent of the way through the material. Some makers publish a specific figure, so a spec sheet may call for replacement at 3 mm on one car and 4 mm on another. Below that, near 2 mm, you are at the bare minimum with almost no cushion, and a single hard stop or a hot descent can push a thin pad into metal contact.
The reason many shops recommend acting at 3 mm to 4 mm rather than 2 mm is margin. Braking demands spike exactly when you cannot plan for them, such as an emergency stop or a long downhill in traffic, and a thin pad has the least material left to absorb that heat and pressure. Replacing with a few millimeters to spare costs the same set of pads it always would, but it keeps a safety cushion between you and a brake that has run out of material. Your choice of friction compound also affects wear rate and noise, which is why our comparison of ceramic versus semi-metallic brake pads is worth a read before you buy your next set.

Wear indicators and the squeal you hear
Most brake pads carry a built-in warning so you do not have to rely on a gauge alone. The most common is a small metal tab, called a wear indicator, riveted or molded into the pad. As the friction material wears down to roughly 3 mm, that tab starts to touch the rotor and makes a high-pitched squeal when you are rolling, often loudest just before you brake. That noise is the pad telling you it is near the replacement line.
A squeal from the wear indicator is a schedule-it warning, not a stop-the-car emergency, but it is not something to sit on either. The sensible response is to book a brake inspection within about one to two weeks, not months. The tab is designed to fire while you still have a little material left, so acting promptly is what keeps you from crossing into metal-on-metal contact.
Grinding is a different sound and a worse sign. If the squeal turns into a harsh metallic grinding, the friction material is likely gone and the steel backing is scoring the rotor. At that point you are risking damage that turns a routine pad job into a rotor job, and stopping distances have already suffered. A gauge check every few months is what lets you catch the 3 mm to 4 mm stage before the noise ever starts.
How to measure brake pad thickness step by step
Measuring a pad with the wheel off takes only a few minutes once you have the routine. Follow these steps for a reliable reading.
- Park safely and let the brakes cool. Choose level ground, set the parking brake, chock the wheels, and let hot brakes cool before you touch anything. Working on a stable, cool car is both safer and easier.
- Loosen, lift, and remove the wheel. Break the lug nuts loose, raise the car with a jack, support it on jack stands, then take the wheel off to expose the caliper and pads. Never rely on a jack alone while your hands are near the brakes.
- Find the friction material. Look at the pad through or beside the caliper. The friction material is the thick block facing the rotor; the flat steel behind it is the backing plate, which you will not measure.
- Set your gauge on the material only. Place a feeler gauge, digital caliper, or micrometer against the friction material so it reads that block alone. If you use a caliper, close the jaws on the material thickness, not on the pad plus backing.
- Read the thinnest of three points. Take a reading at the top, middle, and bottom of the pad. Pads wear unevenly, so the smallest of the three numbers is the one that matters.
- Repeat on every pad and record it. Check both pads at each wheel and all four corners, then write down the numbers. A logged reading turns a single check into a trend that warns you when one corner is wearing fast.
Consistency is what makes the numbers useful. Measuring the same way each time, on the friction material only, is what lets you compare this reading to the last one and see how fast the pads are actually wearing.
Pro tip: Write each reading on a sticker inside the glovebox lid with the date and mileage. Two dated numbers turn a single measurement into a wear rate, so you can predict the replacement month instead of being surprised by a squeal.
Checking pads through the wheel without removing it
You do not always have to pull the wheel for a rough check. If your car has open alloy wheels, you can often see the pad and rotor through the spokes and get a useful estimate in the driveway. These methods are quick triage, not precise measurement, but they are enough to tell you whether a full inspection is due.
- Eyeball it with a flashlight. Shine a light through the spokes at the caliper. You can usually see the outer pad pressed against the rotor and judge roughly how much friction material is left compared with the steel backing.
- Use the popsicle-stick trick. Slide a thin stick or straw down beside the pad, mark it where it meets the outside of the backing plate, then measure the friction material against that mark. It is crude, but it gives you a ballpark number without any teardown.
- Read the molded wear slot. Many pads have a slot cut into the friction face. If that slot has nearly disappeared, the pad is close to the replacement line and it is time for a proper look.
The honest limit is precision. A through-the-wheel look tells you which side of “probably fine” and “check this now” you are on, but it cannot give you a trustworthy millimeter reading, and the inner pad is often hidden. When the quick look raises any doubt, that is your cue to remove the wheel and measure the friction material directly.
The limits of a quick gauge check
A brake pad gauge answers exactly one question: how much friction material is left. That is the most important question, but it is not the only thing that decides whether your brakes are safe, and it helps to know what a reading does not tell you.
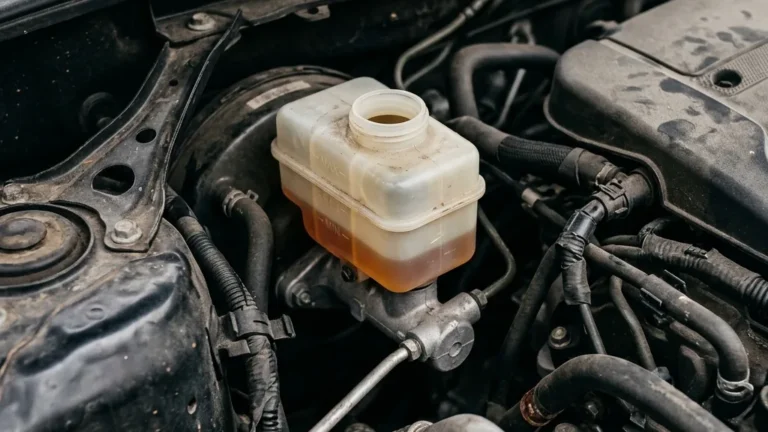
A gauge does not measure your rotors, which wear and can develop grooves, hot spots, or a lip that affects braking even when the pads look fine. It does not judge brake fluid condition, caliper slide health, or a sticking piston that makes one pad wear far faster than its partner. And it cannot see a cracked friction block or a pad that has started to separate from its backing. Those are inspection findings, not measurements.
This is why we treat a gauge as the front line, not the whole story. Measuring monthly or at every oil change catches the slow, predictable wear that accounts for most pad replacements. But a marginal reading, uneven wear between two wheels, or any noise or pulling is a signal to look deeper, because the number alone will not reveal a caliper or rotor problem hiding behind a healthy-looking pad.
What replacement costs and why timing matters
Knowing the numbers on your gauge is only useful if you also know what waiting costs, and brake work gets more expensive the longer you push it. As a rough guide for a typical passenger car, replacing pads only runs about $150 to $300 per axle, parts and labor. If the rotors need replacing at the same time, the figure climbs to roughly $300 to $600 per axle.
The expensive mistake is letting a squeal turn into a grind. When the friction material runs out and the steel backing scores the rotor, you can add about $200 to $400 per axle in rotor damage on top of the pad job. A pad set is cheap compared with a pad-and-rotor set, so catching the 3 mm reading with a gauge, or acting on the wear-indicator squeal within a week or two, is what keeps the bill on the low end.
There is a safety cost too, and it does not show up on an invoice. A worn-out pad makes longer stops and fades faster under heat, which is the last thing you want in an emergency. Groups such as AAA regularly remind drivers that deferred brake maintenance is one of the more common and avoidable roadside failures. A gauge that costs a few dollars is the cheapest insurance in the whole system.
Safety, standards, and who sets them
Brakes are one of the most heavily regulated systems on a car, which is part of why a simple gauge reading carries so much weight. In the United States, NHTSA, the National Highway Traffic Safety Administration, sets the federal braking performance and brake-fluid standards that every new vehicle must meet, and it runs the recall system when a braking defect turns up in the field. You can look up recalls and safety information on the NHTSA site directly.
The engineering behind pads is standardized too. SAE International publishes the test methods and the friction classification codes stamped on the edge of many pads, which is why a pad from one brand can be compared with another on a common scale. Those standards from SAE International are the reason a “brake pad gauge” reading means the same thing across the industry, since the material and its behavior are defined against shared references rather than one maker’s opinion.
Consumer guidance rounds it out. AAA and similar organizations translate the engineering into plain advice for drivers, such as inspecting brakes regularly and not ignoring warning noises. The AAA position lines up with what a gauge tells you: measure early, act on the warning stage, and never treat the bare-minimum thickness as a target. Between NHTSA setting the safety floor, SAE International defining the materials, and AAA advising drivers, a millimeter reading sits on solid ground.
When to see a mechanic
A gauge tells you the thickness, but some findings call for professional eyes. See a qualified brake technician or mechanic when any of these come up.
- Your reading is at or below 3 mm. That is the replace-soon zone. Booking the job now keeps you clear of metal-on-metal contact and the rotor damage that follows.
- Two wheels wear very differently. If one pad is far thinner than its partner or than the other axle, a sticking caliper or slide pin is likely, and a shop should find the cause before fitting new pads.
- You hear squealing or grinding. A steady squeal is the wear indicator; a grind usually means the material is gone. Either way, have it inspected within a week or two, sooner for a grind.
- The car pulls, pulses, or the pedal feels off. Pulling to one side under braking, a pulsing pedal, or a soft or long pedal points to rotor, caliper, or hydraulic issues a gauge cannot measure.
- You see damage. A cracked friction block, a pad separating from its backing, deep rotor grooves, or leaking fluid at a caliper all need a hands-on inspection, not a home measurement.
None of this replaces the routine you can do yourself. A regular gauge check, an eye on the wear slot, and attention to any new noise will catch most problems early. The mechanic is there for the diagnosis and the repair, and your brake pad gauge is what tells you when to go.
Frequently asked questions
How do I use a brake pad gauge?
Set the gauge against the friction material only, not the steel backing plate, and read the thickness in millimeters. Take a reading at the top, middle, and bottom of the pad, then use the thinnest number, since pads wear unevenly. A dedicated feeler gauge gives a fast pass-or-fail check, while a digital caliper gives an exact millimeter figure on a pad you have removed.
What is the minimum brake pad thickness?
New pads carry about 10 mm to 12 mm of friction material. Most carmakers set the replacement line near 3 mm to 4 mm, and roughly 2 mm is treated as the bare minimum with almost no safety margin. Because the exact figure varies by vehicle, check your manufacturer specification and treat any minimum as a hard floor, not a target.
Can I check brake pads without removing the wheel?
Yes, for a rough check. With open alloy wheels you can shine a flashlight through the spokes and estimate the friction material against the rotor, use a stick or straw to gauge the material beside the backing plate, or read the molded wear slot in the pad face. These are triage methods; for a trustworthy millimeter reading you still need to remove the wheel and measure the pad directly.
At what thickness should I replace brake pads?
Plan to replace when the friction material reaches about 3 mm to 4 mm, which is roughly 75 percent worn. Many shops act at that point rather than waiting for 2 mm because braking demands spike without warning and a thin pad has the least material left to handle the heat and pressure. If your gauge shows 3 mm or less, book the replacement soon.
Why are my brakes squealing if the pads still look okay?
That squeal is usually the wear indicator, a small metal tab that touches the rotor when the friction material wears to around 3 mm. It is a designed warning that fires while a little material is left, so the pad can still look present from a distance. Schedule a brake inspection within one to two weeks, because the next stage is grinding and rotor damage.
How much does brake pad replacement cost?
For a typical passenger car, pads only run about $150 to $300 per axle including labor. If the rotors also need replacing, expect roughly $300 to $600 per axle. Letting a squeal become a grind can add about $200 to $400 per axle in rotor damage, which is why measuring early with a brake pad gauge saves money as well as stopping distance.
Do I measure the backing plate or just the friction material?
Only the friction material. The steel backing plate does not stop the car, so including it makes a worn pad look far thicker than it really is. Every accurate brake pad measurement reads the friction block alone, from the backing to the face that meets the rotor, and compares that number against the manufacturer minimum.
A brake pad gauge is one of the cheapest tools you can keep in the garage, and it answers the single question that matters most about your brakes: how much material is left to stop the car. Measure the friction block, not the backing, take the thinnest of a few readings, and act at the 3 mm to 4 mm stage rather than waiting for a grind. Do that, and you trade guesswork for a number you can act on before it becomes a repair bill or a close call.