Quick version: how to check brake pads comes down to three options, from fastest to most precise: look at the pad through the wheel spokes, listen for a high squeal when you brake, and watch for a brake-wear light on the dash. To know whether to replace them, you need a number, not a feeling. A new pad is about 12 mm of friction material; once it drops to roughly 3 mm, about 75 percent worn, it is time to replace. The rest of this guide is how to see that number for yourself and what each warning sign actually means.
The three fastest ways to check, ranked
Checking your pads reliably comes down to three methods, and you should use all three because each catches a different stage of wear. The fastest is a visual look through the wheel: with the car parked and the steering turned, you can usually see the outer pad squeezed against the shiny rotor and judge how much friction material is left. The second is sound: most pads carry a small metal tab that starts a high, steady squeal when the lining wears down to about 3 mm, which is your early warning to plan a replacement. The third is the dashboard: many newer cars use an electronic sensor that lights a brake-wear warning when the pad hits its minimum. None of the three is perfect alone, so treat a clean visual, a quiet brake, and a dark dashboard as three boxes that all need ticking.
What you are actually looking at
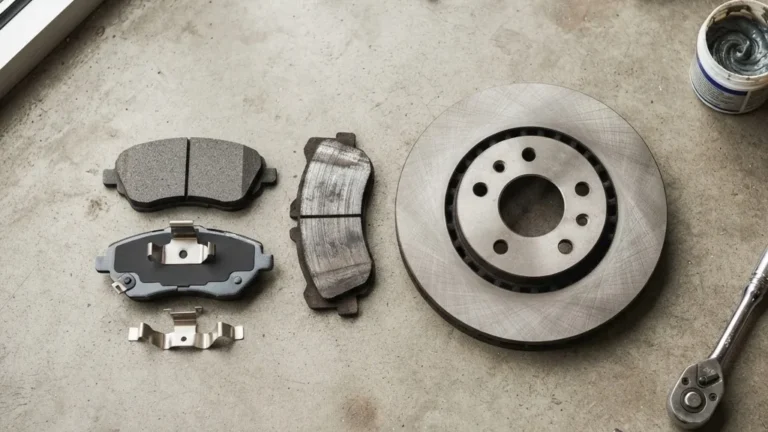
A brake pad is one half of a friction couple: the pad clamps onto a spinning rotor, and the friction slows the car while wearing the pad down a little with every stop. When you inspect, you are measuring the friction material that is left on the metal backing plate, not the plate itself. That distinction matters, because people glance at the thick steel backing and assume they have plenty of pad when the lining is nearly gone. Brakes are a safety system, not a comfort item: according to the National Highway Traffic Safety Administration, a light vehicle must stop from 100 km/h, about 62 mph, within 70 meters, and a worn pad quietly erodes that margin long before it grinds. So when you check, you are really answering one question: how much friction material stands between you and that stopping distance.
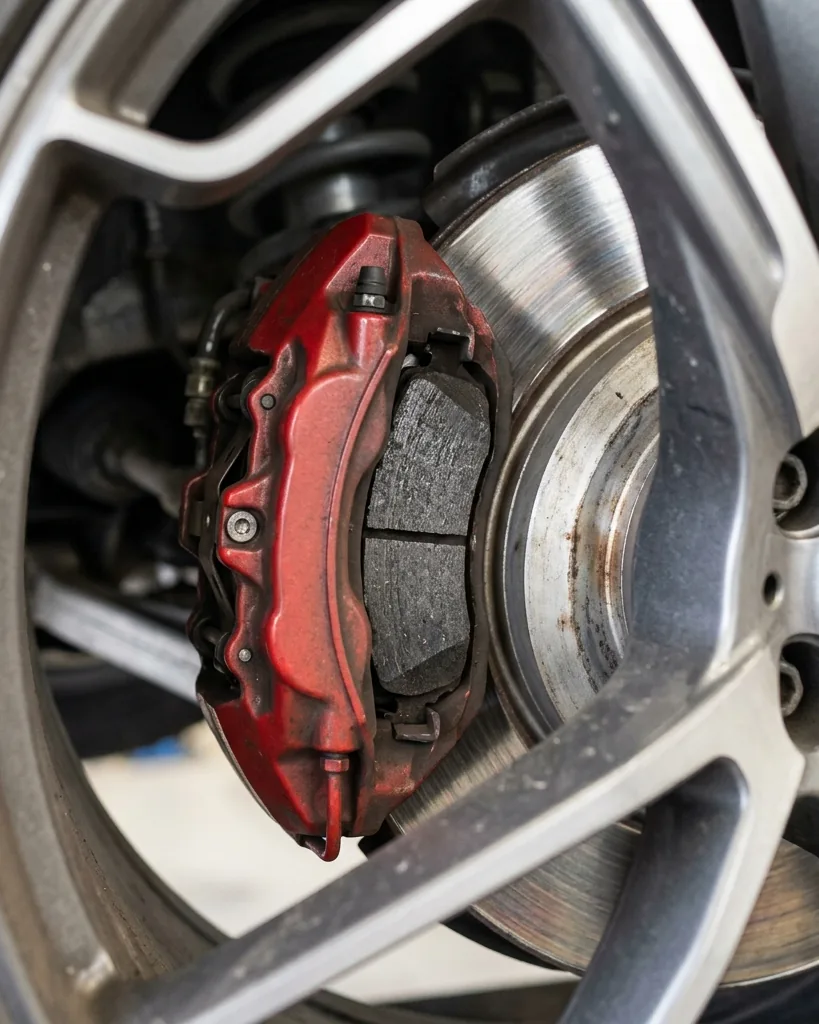
Method 1: look through the wheel spokes
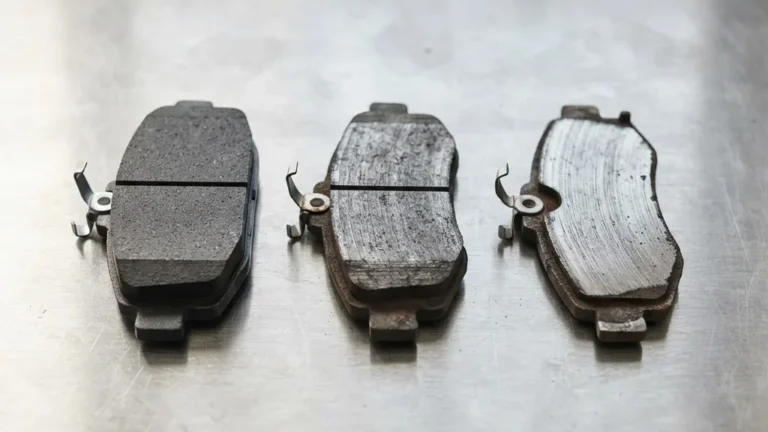
Start with the no-tools check that takes a minute per corner. Park on level ground, turn the steering wheel fully so the front caliper rotates into view, and shine a flashlight at the pad pressed against the rotor. You are looking at the thickness of the friction lining, not the backing plate behind it. A healthy pad shows a clear block of material; a pad near its limit looks like a thin sliver against the disc. Check the pad on both sides of the rotor if you can see them, because the inner pad often wears faster than the outer one and is the one people miss. This look will not give you a millimeter reading, but it reliably sorts a pad into one of three buckets: plenty left, getting thin, or replace now. If it lands in the last two, move to a proper measurement before you decide.
Method 2: listen for the wear indicator
Your brakes are designed to tell you when they are tired, and the cheapest sensor is a sound. Most pads include a hardened metal tab, a wear indicator, positioned so it touches the rotor once the lining wears to roughly 3 mm, about three-quarters of the way through. The result is a high, steady squeal that appears when you are rolling and often fades when you press the pedal hard. That squeal is not a failure yet; it is the pad asking to be replaced within the next few hundred miles. Do not confuse it with an occasional morning squeak from surface rust or moisture, which clears after the first few stops. The friction-material standards behind these pads, published by SAE International, govern how consistently a pad performs, but the wear tab is pure mechanical honesty: when it sings, the clock is running. A grinding noise, by contrast, is a different and urgent message covered below.
Method 3: read the dashboard sensor
Many newer vehicles, and most European ones, replace the squeal with an electronic brake-wear sensor wired into the pad. When the lining wears to its minimum, the circuit completes and a brake-wear warning appears on the dash. This is convenient but it has two traps. First, the light usually means the pad is already at its limit, not approaching it, so it is a deadline, not a heads-up. Second, dashboard messages are easy to misread, since a brake-wear light, a low-fluid light, and a service reminder can look alike; our guide on what a dashboard service-monitor message means shows how to tell warnings apart. If the light is specifically for brake wear, treat it as a same-week job. A sensor that never lit is not proof of healthy pads either, since sensors can fail, which is exactly why you still do the visual and the listen test.
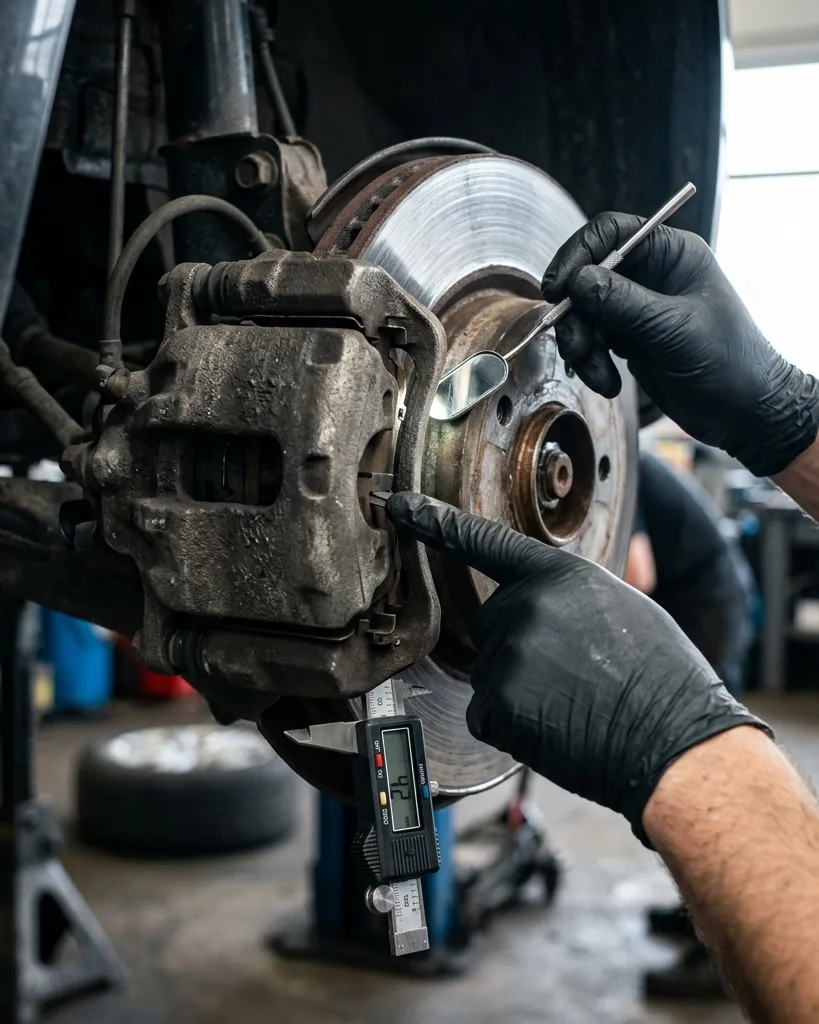
How to measure pad thickness accurately
When the visual says a pad is borderline, stop guessing and measure it. This is the step that turns a worry into a decision, and it takes about ten minutes with the wheel off.
- Loosen, lift, and remove the wheel. Break the lug nuts while the car is on the ground, then jack the car, set it on a stand, and take the wheel off so the caliper and pad are fully exposed.
- Find the friction material. Look at the pad seated in the caliper; the lining is the softer block bonded to the metal backing plate.
- Measure from the backing plate to the friction edge. Use a caliper or a brake-pad thickness gauge and read the remaining material in millimeters. Measure the most worn point, not the thickest.
- Check the inner pad and the other wheel. The inner pad and the front axle usually wear faster, so never judge the set from one corner.
- Write the numbers down. Four readings give you a wear pattern, which matters as much as any single figure.
With real numbers in hand, the replace-or-wait question answers itself, and you can also spot uneven wear that points to a sticking caliper.
How to read the number: thickness to action
This is the part most guides skip. A measurement only helps if you know what each thickness means, so use this table to turn millimeters into a decision. The figures are typical references; your vehicle’s service manual is the final word.
| Friction material left | What it means | What to do |
|---|---|---|
| About 12 mm (1/2 in) | New or like new | Drive, recheck in about 6 months |
| 6 to 4 mm | Roughly half worn | Plan a replacement soon |
| About 3 mm (1/8 in) | At the limit; sensors trigger | Replace now |
| Under 3 mm or squealing | Past the safe zone | Replace before driving far |
| Metal on metal (grinding) | Pad has failed | Stop; do not keep driving |
One nuance worth knowing: there is no US federal minimum for how much friction material a pad must keep, which is why the 3 mm rule is a mechanic’s convention rather than a law. For reference, the UK sets a legal minimum of 1.5 mm, and that is already deep into the danger zone, not a target to aim for.
Check the rotor while you are there
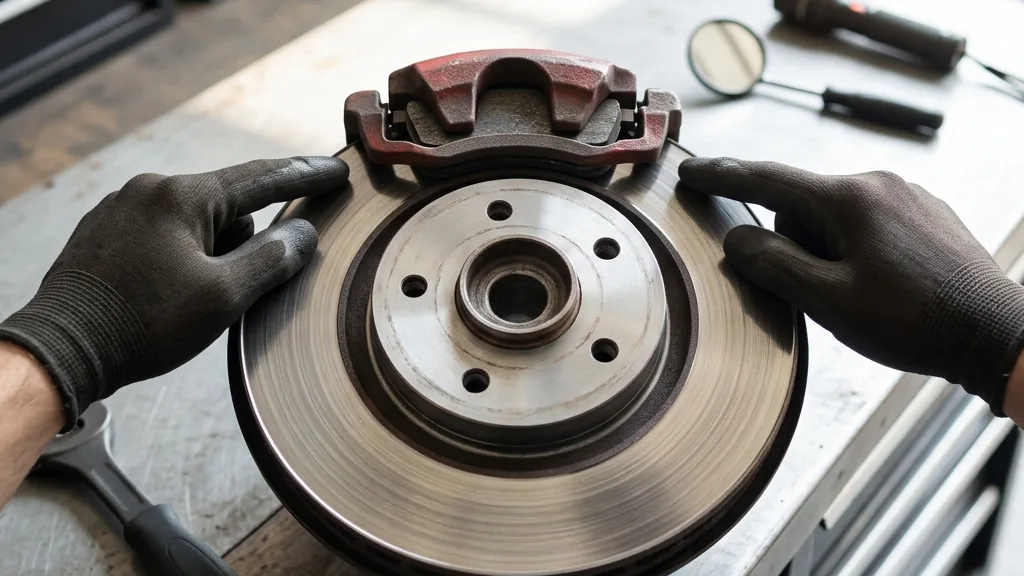
Pads and rotors wear as a pair, so inspecting one without the other is half a job. With the wheel off, run a fingernail across the rotor face from the center outward: a pronounced ridge, or lip, at the outer edge tells you the disc has worn down inside that ridge. Then find the minimum thickness, usually stamped on the rotor hub or edge as a “min th” or “discard” figure in millimeters, and measure the disc with a micrometer if it is close. A rotor below its discard spec cannot be safely resurfaced and must be replaced. You should also note any deep scoring, blue heat spots, or a thickness that varies around the disc, since uneven rotor thickness is the usual cause of a pedal or steering-wheel pulse.
A quick way to remember it: the pad tells you how much braking material is left, while the rotor tells you whether that material has a flat, true surface to grip. Checking the rotor at the same time as the pad is what separates a real brake inspection from a quick glance, and it often explains a symptom the pad alone never would.
Warning signs, by urgency
If you only ever react to symptoms, learn this order so you respond correctly. A high, steady squeal is the wear indicator at roughly 3 mm: plan a replacement, but it is not an emergency. A deep grinding or growling that you feel through the pedal is metal backing plate on rotor: the friction material is gone, you are damaging the disc with every stop, and you should stop driving and get it fixed. A pulsing in the pedal or steering wheel under braking points to an uneven rotor rather than the pad. A pedal that sinks slowly or feels soft is usually a hydraulic or fluid problem, not pad wear, and deserves its own diagnosis. Matching the symptom to the right cause stops you from replacing pads that were never the problem, and it stops you from ignoring a grind that is.
How often to check
Brake pads do not wear on a fixed schedule, so the right habit is regular inspection rather than a calendar replacement. A practical rhythm, in line with what motoring bodies such as AAA recommend, is to look at your pads about every six months, or simply every time the wheels are off for an oil change or a tire rotation. Real-world pad life runs roughly 25,000 to 70,000 miles, and the spread is huge because it depends on whether you mostly cruise highways or crawl through stop-and-go traffic, how heavy your vehicle is, and how hard you brake. Front pads wear faster than rear on most cars because the front does the majority of the stopping. The point of a steady check is simple: you want to catch a thin pad at the squeal stage, never at the grinding stage.
Electric and hybrid vehicles are different
If you drive an EV or hybrid, the inspection shifts. Regenerative braking does most of the slowing in normal driving, so the friction pads work far less and can last much longer than on a comparable gas car. That sounds purely good, but it has a catch: pads and rotors that rarely get used can corrode, and a rusty, pitted rotor bites unevenly even with plenty of pad left. So on an EV, you are checking two things, not one: the friction material thickness, and the condition of the rotor surface. Knowing your vehicle’s weight and tire setup also helps, since heavier EVs put more energy into the rare hard stop; learning how to read your tire sidewalls is a useful companion check. The lesson is that on an electric car, low wear does not mean no inspection.
When to stop and call a professional
Some findings are a clear signal to hand the job over. If you hear grinding, feel a pulse in the pedal, or the pedal sinks or feels spongy, do not keep driving and diagnosing; have a qualified technician inspect the system. The same goes for any reading you are unsure about, or pads that are wearing unevenly, which can point to a seized caliper or slide pin that a DIY thickness check will not fix. Brakes are the one system where an optimistic guess has no upside: the cost of a professional inspection is small next to the cost of being wrong. Checking your own pads is a great habit, but knowing the line where a check becomes a repair is part of doing it well.
Common mistakes when checking brake pads
A few errors make people misjudge a perfectly readable pad, so avoid these. The first is mistaking the steel backing plate for friction material: the thick metal you see behind the lining is not the part that wears, and reading it makes a worn pad look healthy. The second is checking only the outer pad; the inner pad sits hidden against the hub and often wears faster, so a clean outer pad can hide a finished inner one.
The third mistake is judging the whole car from a single corner: front pads wear faster than rear, and a sticking caliper can wear one wheel far ahead of the others, so always compare all four. The fourth is treating a first-thing-in-the-morning squeak as a wear squeal; light surface rust squeaks for the first few stops and then clears, while a true wear indicator squeals steadily once the car is rolling. The last is ignoring the rotor, which wears alongside the pad and decides whether you also feel a pulse. Skip these traps and your inspection actually tells the truth.
Frequently asked questions
How do I know if my brake pads need replacing?
Use three signals together. If the pad measures around 3 mm or less, if you hear a steady high squeal when rolling, or if a brake-wear light is on, it is time to replace. Grinding means you are already past due and should stop driving until the brakes are serviced.
Can I check brake pads without removing the wheel?
Yes, for a rough check. With the steering turned for a clear view, you can see most pads through the wheel spokes and judge the friction material against the rotor. For an exact figure, though, remove the wheel and measure from the backing plate to the friction edge with a caliper or thickness gauge.
What is the minimum brake pad thickness?
A new pad is about 12 mm. Most mechanics replace at roughly 3 mm, around 75 percent worn, which is where sensors usually trigger. There is no US federal minimum for friction material; the UK legal minimum of 1.5 mm is already unsafe, so treat 3 mm as your real line.
How often should I check my brake pads?
About every six months, or whenever the wheels are off for an oil change or tire rotation. Because pad life ranges from roughly 25,000 to 70,000 miles depending on how you drive, regular checks catch wear early instead of letting it reach metal on metal.
Is it safe to drive with worn brake pads?
Treat it as borrowed time, not a green light. A squealing pad at about 3 mm still stops the car, but it is at its wear limit, so book the replacement now rather than postponing it. A grinding pad is genuinely dangerous: metal on metal lengthens your stopping distance and ruins the rotor, so it should be fixed before you drive any real distance, not after.
Bottom line: checking brake pads is three habits, not one. Look through the wheel, listen for the squeal, and watch the dash, then measure in millimeters when anything looks borderline. Replace around 3 mm, check the rotor at the same time, and treat grinding as a stop-driving event. Do that a couple of times a year and your brakes will warn you with a squeal, never a surprise.
Disclaimer: This article is general automotive information, not a substitute for a hands-on inspection or your vehicle manufacturer’s specifications. Brakes are safety-critical. Confirm the exact wear limits for your make, model, and year, and have a qualified technician do the work if you are unsure.
Sources
- National Highway Traffic Safety Administration – vehicle brake performance and safety (FMVSS 135).
- SAE International – brake friction-material test standards (J2784, J661).
- AAA – recommended brake inspection interval.
- Haynes and Firestone technical guides – pad thickness measurement and wear indicators.