Brake drums are the spinning steel or cast-iron housings that turn with your rear wheels and give the brake shoes a surface to press against when you slow the car. Most drivers never see them because they hide behind the wheel and inside a sealed drum, yet on a huge number of everyday cars they still do half the stopping work. If you have ever heard a scraping sound from the back of the car or felt the parking brake go soft, the drums are often where the story starts.
This guide from the BrakeTireGuide team walks through what brake drums are, the parts inside a drum brake, how the system actually clamps, how drums compare with disc brakes, the signs that a drum is worn out, and what machining and replacement really cost. This article is educational and is not a substitute for a qualified brake technician or a hands-on inspection. Brakes are a safety system, so always follow your vehicle manufacturer specifications, and when a measurement or a symptom looks marginal, have a professional confirm it before you drive.
Short answer up front: a brake drum is the friction housing that the brake shoes push outward against to stop the wheel. Drums are cheap, durable, and make a strong parking brake, but they trap heat and can fade under hard use. A stamped maximum diameter, when present, tells you when a drum is done.
By Rohan Pettis, brakes lead at BrakeTireGuide.
Most articles explain drums in the abstract. This guide adds the one number that decides replacement, the stamped maximum diameter, plus an original drum-versus-disc comparison and the real machining limits, so you know when a drum is truly done instead of guessing.
What brake drums are and where they sit
A brake drum is a round, hollow housing, usually cast iron, that bolts to the wheel hub and rotates with the wheel. Its inner surface is a smooth machined wall. When you press the pedal, curved brake shoes lined with friction material are forced outward against that inner wall, and the friction between shoe and drum slows the wheel. Let off the pedal and springs pull the shoes back, releasing the drum so it can spin freely again.
Drum brakes are almost always found on the rear axle of passenger cars, while the front axle uses disc brakes. The front does most of the braking because weight shifts forward when you stop, so many carmakers pair strong front discs with cheaper rear drums to save money and weight. You will also find drums on a large share of utility trailers, boat trailers, and heavy commercial trucks, where the sealed design and low cost make sense. Passenger-car drums typically measure 8 to 12 inches (about 200 to 305 mm) across the inside, with compact cars often near 9 to 10 inches.
Because the whole assembly is enclosed, dirt, water spray, and road grit stay out better than they do with an exposed disc. That sealing is one reason drums have hung on for so long on the rear of budget cars and on trailers that sit unused for months. Before you dig into the rear brakes, it helps to know the condition of the fronts too, and our guide on how to check brake pads pairs naturally with a rear-drum inspection.

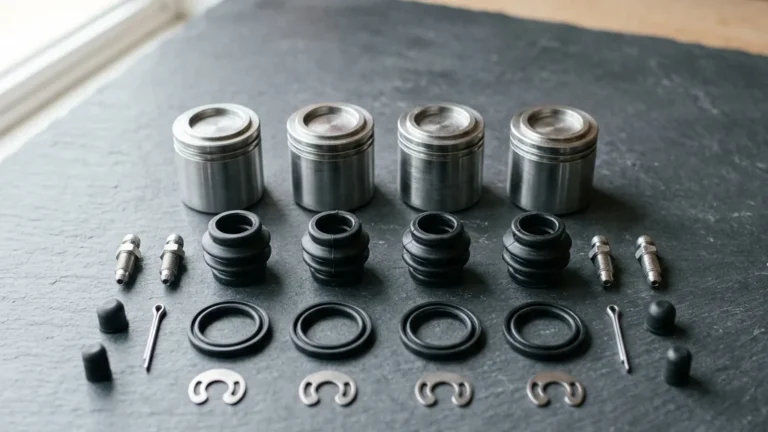
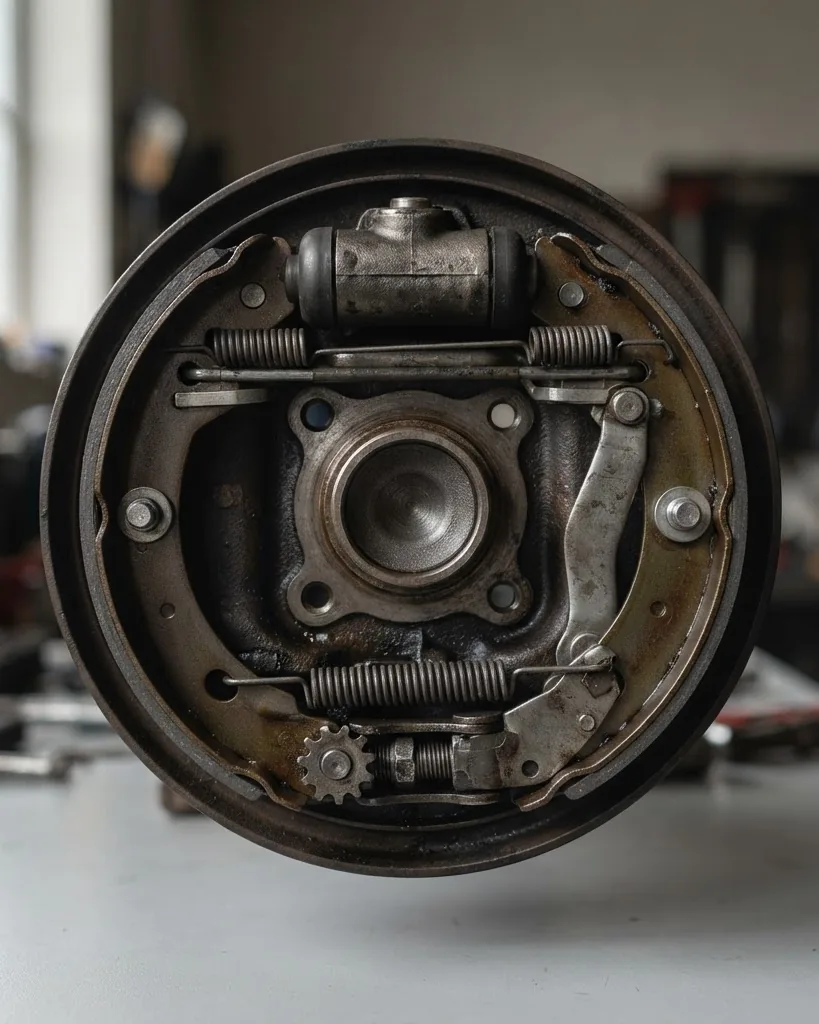
The parts inside a drum brake
A drum brake looks busy when you first pull the drum off, but it is a small set of parts that each do one job. Knowing the names makes every later step easier to follow.
- Backing plate. The steel plate bolted to the axle that everything mounts on. It also seals the back of the assembly against dirt and water.
- Brake shoes. Two curved metal shoes faced with friction lining. One is the primary or leading shoe and one is the secondary or trailing shoe. The lining is the wear item, much like a disc brake pad.
- Wheel cylinder. A small hydraulic cylinder at the top with two pistons. Brake fluid pressure pushes those pistons out, which spreads the tops of the shoes apart and into the drum.
- Return springs. Strong coil springs that pull the shoes back off the drum the instant you release the pedal, so the brakes do not drag.
- Hold-down springs. Smaller springs and pins that keep each shoe flat against the backing plate while still letting it move outward.
- Self-adjuster. A star-wheel screw and lever that lengthens as the shoes wear, keeping the shoes close to the drum so the pedal stays high.
- Parking brake lever and cable. A mechanical link that pushes the shoes into the drum when you set the handbrake, with no hydraulic pressure needed.
The brake drum itself is the eighth piece, sliding over all of that hardware. When the drum is off, you are looking at the shoes, the wheel cylinder between their tops, the springs, and the adjuster near the bottom. That is the entire show.
How drum brakes actually work
The action starts at the pedal. Pressing it pressurizes the brake fluid, and that pressure travels down the line to the wheel cylinder inside each drum. The wheel cylinder pistons push outward and spread the tops of the two shoes apart, forcing the friction linings against the spinning inner wall of the drum. Friction turns the wheel’s motion into heat, and the wheel slows.
Drum brakes add a clever trick called the self-energizing or servo effect. As the leading shoe touches the rotating drum, the drum tries to drag that shoe around with it, wedging the shoe harder into the drum wall. The brake partly amplifies its own clamping force. That mechanical advantage is why a relatively small drum can hold a car firmly, and it is a big reason drums make such a strong, cheap parking brake. The trade-off is that the same wedging action makes drum braking a little less linear and predictable than a disc, which clamps with steady, even force.
When you lift off the pedal, fluid pressure drops and the return springs snap the shoes back off the drum. Those springs matter more than they look. A weak or broken return spring can leave a shoe touching the drum, which drags, overheats, and wears the lining fast. If the linings ever wear away completely, the metal shoe backing grinds directly on the drum, and that is the loud scraping that means expensive damage is already happening.
The self-adjuster and why reverse stops matter
As the friction linings wear thinner, the shoes have to travel farther to reach the drum. Left alone, that would make the brake pedal sink lower and lower before the brakes bite. The self-adjuster fixes this automatically. It is a threaded star wheel with a lever that clicks the adjuster a notch longer whenever the shoes move past a set gap, which pushes the shoes back out toward the drum and keeps the pedal high.
On most designs the adjuster only acts under specific conditions, usually when you brake while backing up, or when you apply the parking brake. That is why an old shop tip is to back up and brake firmly a few times after a rear-brake service, or to cycle the parking brake, to let the self-adjusters set the gap. If the adjuster seizes from rust, the pedal slowly gets lower and the rear brakes feel lazy, even though nothing is truly broken. A stuck adjuster is a common and cheap find during a drum inspection.
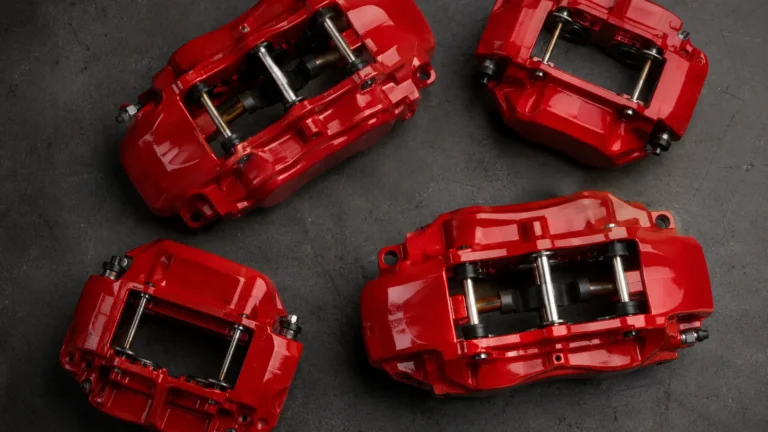
Drum brakes versus disc brakes
Drums and discs both use friction, but they package it very differently, and each has jobs it does better. The table below lays out the practical differences the BrakeTireGuide team weighs when we explain the two systems.
| Factor | Drum brakes | Disc brakes |
|---|---|---|
| Cost to build and service | Lower; cheaper parts | Higher; pricier calipers and rotors |
| Heat handling | Enclosed; traps heat, can fade | Open; sheds heat well, resists fade |
| Wet performance | Can trap water inside | Wipes water off quickly |
| Parking brake | Strong and simple built in | Needs an extra mechanism |
| Protection from dirt | Sealed; good for trailers | Exposed to grit and spray |
| Ease of service | Fiddly springs, more time | Quick pad swaps |
| Typical placement | Rear of economy cars, trailers | Front of nearly all cars |
The headline weakness of drums is heat fade. Because the drum is closed, the heat from repeated or prolonged braking, such as a long mountain descent or towing a loaded trailer, builds up inside and cannot escape into open air the way it does on a vented disc. As the drum and linings get very hot, the friction drops and the pedal feels weaker, which is brake fade. Disc brakes handle that punishment better, which is exactly why the harder-working front axle uses them almost universally. Vehicle stopping performance is regulated in the United States, and the National Highway Traffic Safety Administration, or NHTSA, sets the federal service-brake standards every new car must meet, whichever mix of drums and discs it uses.
Why brake drums are still used
If discs are better at shedding heat, it is fair to ask why drums have not disappeared. The answer is that on the rear of a light car and on many trailers, drums do the job well for less money. Here is where they still make sense.
The engineering context makes the choice rational. Under hard braking, the front axle delivers roughly 60 to 70 percent of the total stopping force, leaving the rear axle only 30 to 40 percent of the work. Passenger-car and light-truck rear drums typically run about 180 to 270 mm in diameter, roughly 7 to 11 inches, cast in gray iron; the common SAE G3000 grade specifies a minimum tensile strength of 30,000 psi, ample for that share of the load. Heat is the one real limit: drum surface temperatures can pass 260 degrees Celsius, about 500 degrees Fahrenheit, under repeated hard stops, the practical threshold where fade sets in, but a rear axle doing a third of the work rarely reaches it. Even the parking-brake role has a number behind it: under UNECE rules a parking brake must hold a fully laden passenger car on a 20 percent gradient, a bar the self-energizing drum geometry clears with a simple cable.
- Rear of economy cars. The rear axle carries less of the braking load, so it does not need the heat capacity of a disc. A cheaper drum is plenty, and it trims cost on budget models.
- Parking brake duty. The self-energizing wedge effect makes a drum a naturally strong parking brake, with the cable simply pushing the shoes into the drum. Discs need an added caliper mechanism to do the same job.
- Trailers and heavy trucks. The sealed housing keeps out mud, sand, and salt, and resists rust when a trailer sits parked for months. Many commercial trailers and heavy trucks still run drums by default because they are rugged, cheap to maintain, and adequate for steady highway stops.
- Longevity. With less load and a protected interior, rear drum components often outlast the more heavily worked front brakes.
Engineering bodies such as SAE International publish the recommended-practice standards that govern brake friction materials and testing for both drum and disc systems, which is part of why a modern drum brake, humble as it looks, is a well-characterized and reliable piece of hardware. Drums are not obsolete; they are just used where their strengths line up with the job.
Signs of worn brake drums
A drum wears slowly, then tells on itself with a handful of clear symptoms. Watch and listen for these, and pull a drum to inspect if more than one shows up.
- Scoring and deep grooves. Worn shoes, grit, or a metal-on-metal contact cut circular grooves into the drum’s friction surface. Light scoring can sometimes be machined out; deep grooves mean replacement.
- Out-of-round. Heat and uneven wear can leave the drum no longer perfectly circular. An out-of-round drum makes the pedal pulse and the car shudder under light braking.
- Blue hard spots. Overheating creates blue-tinted, heat-hardened patches on the drum. These raised hard spots grab unevenly and cause pulsation and rapid shoe wear.
- Grinding or scraping. A grinding noise usually means the linings are gone and metal is cutting the drum. This is past the cheap-fix stage and often ruins the drum.
- Soft or low pedal. A spongy or sinking pedal can point to worn drum components, a seized adjuster, or a leaking wheel cylinder inside the drum.
- Weak parking brake. If the handbrake no longer holds on a slope, worn drums, glazed shoes, or a stretched cable are likely suspects.
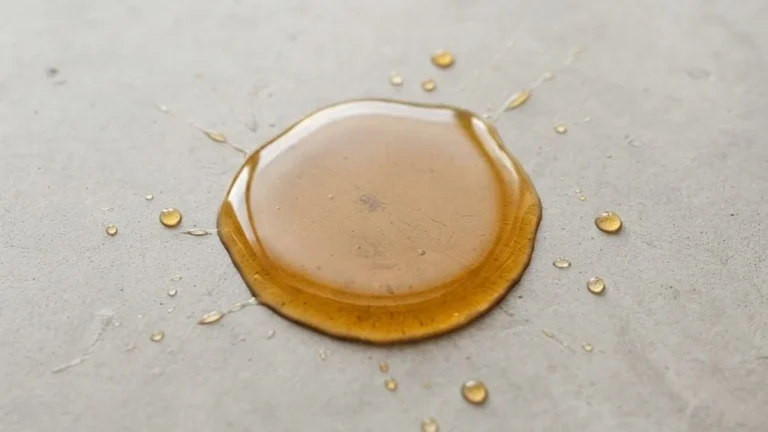
- Cracks or a leaking cylinder. A cracked drum or brake fluid weeping onto the shoes is an immediate replace-and-repair situation.
A leaking wheel cylinder deserves special attention, because it can be the first sign the whole hydraulic side needs a look. If your dashboard warns of low fluid or the pedal feels off, our guide to low brake fluid symptoms covers what those warnings mean and how urgent they are.
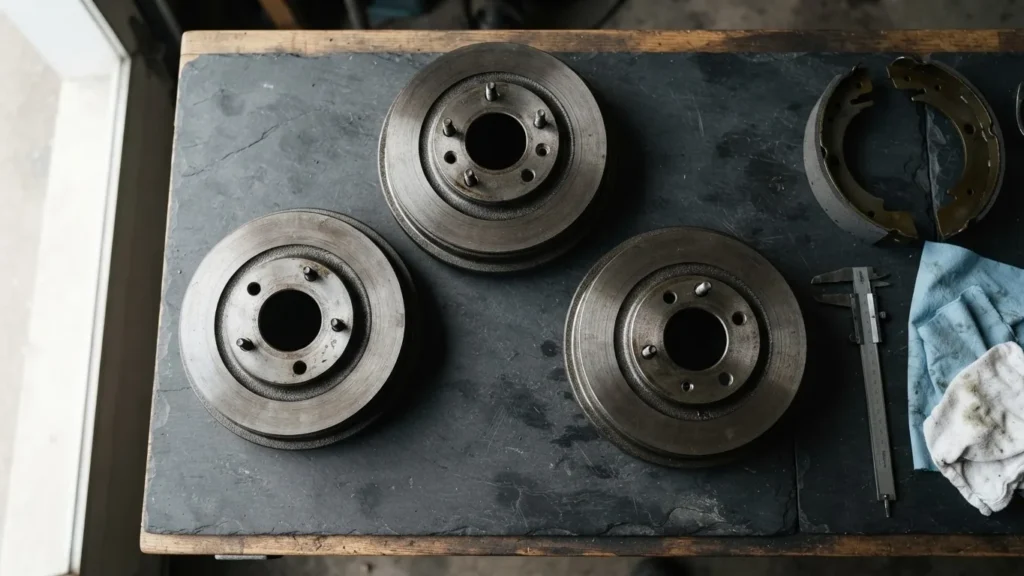
The stamped maximum diameter and machining limits
Here is the single most important number on a brake drum, and the one casual guides skip. A brake drum is manufactured with a nominal inside diameter and may be cast or stamped with a maximum, or discard, diameter. As the drum wears or gets machined on a lathe, its inside diameter grows. Once the friction surface reaches that stamped maximum, the drum must be replaced, no exceptions. A drum worn past its limit has walls too thin to shed heat safely, and thin walls flex under braking, distort, and can crack.
Safety warning: Never reinstall a drum that measures at or past its stamped maximum (discard) diameter, even if it looks fine. Thin walls overheat, distort, and can crack under a hard stop. The stamped number is a hard limit, not a suggestion, and machining a drum beyond about 0.060 inch oversize is not allowed.
When a drum has only light scoring, mild glazing, or small runout, a shop can turn it on a brake lathe, shaving a thin, even layer off the friction surface to restore a clean, round wall. But machining removes metal and grows the diameter, so it is only allowed if the finished size stays under the stamped maximum. The long-standing accepted machining standard is roughly 0.060 inch (about 1.5 mm) of oversize over the nominal diameter, and some drums permit up to 0.090 inch. The lathe operator must measure before cutting to confirm there is room. Many drums also carry a cast-in minimum wall thickness; a drum thinner than that number is scrap even if the diameter still checks out.
In practice, modern drums are often thin enough that machining is not worth it, and a new drum can cost about the same as the labor to turn an old one. When a drum is out-of-round, deeply scored, or already near its maximum, the BrakeTireGuide team’s default is to replace rather than resurface. Replacing gives you a known-good round surface, and it removes the risk of running a drum that a lathe pushed too close to the edge of its spec.
Pro tip: Always service drum brakes one side at a time and leave the other side assembled as a reference photo. The return springs, adjuster, and self-adjuster cable go back in a specific order, and having an intact side to copy saves the most common drum-brake headache: a spring left off after reassembly.
How to measure a brake drum
Measuring a drum is straightforward with the right tool, and it turns a guess into the number that decides machine-or-replace. Follow these steps, or hand the drum to a shop that has a proper drum micrometer.
- Find the stamped maximum diameter. Look on the outer face or the edge of the drum for a figure marked as maximum diameter, max dia, or discard diameter. Note it before you measure anything.
- Clean the friction surface. Wipe out dust and grit so the tool sits on bare metal. Wear a mask and never blow brake dust into the air.
- Set a drum micrometer or gauge. Place an inside micrometer or a dedicated drum gauge across the friction surface so it reads the inside diameter.
- Measure at several points. Take readings at a few spots around the drum and at two depths across the width. The largest number is the one that counts, because it captures the worst wear and any out-of-round.
- Compare to the stamped limit. If the largest reading is at or above the stamped maximum, the drum is finished. If it is under, and there is room to stay under after a cut, machining may be an option.
- Check for out-of-round. A spread between your readings around the drum indicates it is no longer perfectly circular, which on its own can justify machining or replacement.
If you do not own a drum micrometer, this is a fair thing to leave to a shop. The tool is specialized, and reading it correctly is what keeps a marginal drum off the road. Independent safety groups such as IIHS focus on how quickly and consistently a vehicle stops in real testing, and a worn, out-of-round drum quietly eats away at exactly that consistency long before it makes an obvious noise.
Lifespan and replacement cost
Brake drums are among the longest-lived parts of the brake system. The brake shoes inside, by contrast, are the true wear item. It is normal to replace shoes two or three times over the life of one set of drums, which is why many people confuse a shoe job with a drum job.
The spread is wide because it depends on whether you reuse the drums, how seized the hardware is, and local labor rates. Doing only shoes and hardware, with drums that still measure within spec, sits at the lower end.
Two habits stretch drum life. First, replace worn shoes before the lining is gone, because metal-on-metal contact is what scores and ruins a drum. Second, keep the self-adjusters and parking-brake cables working, since a dragging shoe overheats a drum and warps it. Regular inspection and timely shoe replacement help protect the drum.
When to see a mechanic
Plenty of drivers inspect and even service their own rear drums, but some findings call for professional hands. See a qualified brake technician when any of these come up.
- Grinding or scraping from the rear. That noise usually means the linings are gone and the drum is being cut. Stop driving hard on it and get it looked at promptly.
- A drum at or near its stamped maximum. If a measurement is close to the discard limit, let a shop confirm the number and fit new drums.
- Pedal pulsation or a shudder when braking. Out-of-round drums or hard spots need a diagnosis and often replacement, not a guess.
- Any fluid leak inside the drum. A weeping wheel cylinder contaminates the shoes and points to hydraulic work; it is a safety repair.
- A parking brake that will not hold. Weak holding on a hill can be worn drums, glazed shoes, or a cable, and it is worth a professional look.
- You are unsure. On a braking system, a second opinion is cheap. NHTSA advises following your owner’s-manual service schedule and having brakes inspected by a professional when something feels wrong.
None of that replaces the simple checks you can do yourself. Pulling a drum once a year, eyeing the friction surface for scoring, and confirming the shoes still have lining will catch most problems while they are still cheap.
Sources and further reading
The safety framing, figures, and standards referenced above draw on the following authorities. Each link points to the organization’s current homepage so it stays valid over time.
- National Highway Traffic Safety Administration (NHTSA), federal motor vehicle safety standards and recalls: https://www.nhtsa.gov/
- SAE International, engineering test methods and standards for brake and vehicle components: https://www.sae.org
- Insurance Institute for Highway Safety (IIHS), independent braking and crash-avoidance research: https://www.iihs.org/
Frequently asked questions
What are brake drums and what do they do?
Brake drums are the round cast-iron housings that rotate with your rear wheels and give the brake shoes a surface to press against. When you brake, hydraulic pressure pushes the shoes outward into the drum, and the friction slows the wheel. They also anchor the parking brake, since the handbrake cable pushes the same shoes into the drum mechanically.
How long do brake drums last?
The brake shoes inside wear faster than the drums themselves. Keeping the shoes fresh and the adjusters free helps extend drum life.
Can brake drums be machined instead of replaced?
Sometimes. A drum with light scoring or minor out-of-round can be turned on a brake lathe if the finished inside diameter stays under the maximum stamped on the drum. The accepted machining standard is about 0.060 inch of oversize, up to 0.090 inch on some drums. If turning would exceed the stamped maximum, or the drum is below its minimum wall thickness, it must be replaced.
Where is the maximum diameter on a brake drum?
The maximum, or discard, diameter is cast or stamped into the drum, usually on the outer face or the edge, marked as max diameter or discard diameter. Measure the inside friction surface with a drum micrometer at several points; if the largest reading reaches or passes that stamped number, the drum is worn out and cannot be safely machined or reused.
What are the signs of worn brake drums?
Common signs are deep scoring or grooves on the friction surface, a pulsing pedal or shudder from an out-of-round drum, blue heat-hardened hard spots, grinding noises, a soft or low pedal, and a parking brake that no longer holds on a hill. A cracked drum or a leaking wheel cylinder inside the drum calls for immediate replacement and repair.
Why do cars still use drum brakes on the rear?
The rear axle handles less braking load, so a cheaper drum is enough, and the enclosed design seals out dirt and water and makes a strong, simple parking brake. That is why many economy cars, and most trailers and heavy trucks, still run rear drums. The harder-working front axle uses disc brakes because they shed heat better and resist fade.
Are drum brakes as safe as disc brakes?
For their intended job, yes. A properly maintained rear drum meets the same federal stopping standards a car must pass. Discs are better at handling heat during hard or repeated stops, which is why they are used up front, but a well-serviced drum on the rear axle stops safely. Safety comes down to maintenance: worn linings, an out-of-round drum, or a seized adjuster is what makes any brake unsafe.
Brake drums are old technology that still earns its place on the rear of everyday cars and on the trailers behind them. Learn the parts, watch for scoring and pulsation, respect the stamped maximum diameter, and keep the shoes fresh, and a set of drums will quietly do its job. When a reading or a symptom is borderline, measure it or let a professional measure it, and let the number make the call.