
The center high-mount stop lamp reduced rear-end collisions by 4.3% in the years following its federal mandate. That’s roughly 137,000 fewer crashes annually. Most drivers don’t think about the third brake light until it fails an inspection or a cop pulls them over. By then, the questions pile up: Is it legally required? Can I drive with it out? How much to fix it?
This guide covers the third brake light from every angle: what it does, what the law says, why it fails, and how to replace it yourself. If you’re dealing with a burned-out bulb or considering an LED upgrade, you’ll find what you need here. For a broader look at brake system components including drums, calipers, and dashboard warnings, the Brake Drums guide ties everything together.
Important: This guide is for informational purposes only. Automotive electrical work carries risks. Always ensure your vehicle is in Park with the ignition off before working on any electrical components. If you’re replacing fuses or testing circuits, disconnect the negative battery terminal first when possible. State regulations regarding third brake lights may vary and change over time: verify current requirements with your local DMV or inspection station. For complex electrical repairs or if you’re uncertain about any step, consult a qualified mechanic. Prices mentioned are approximate as of early 2026 and may vary by retailer and region.
Let’s get the terminology right first.
What Is the Third Brake Light (CHMSL)
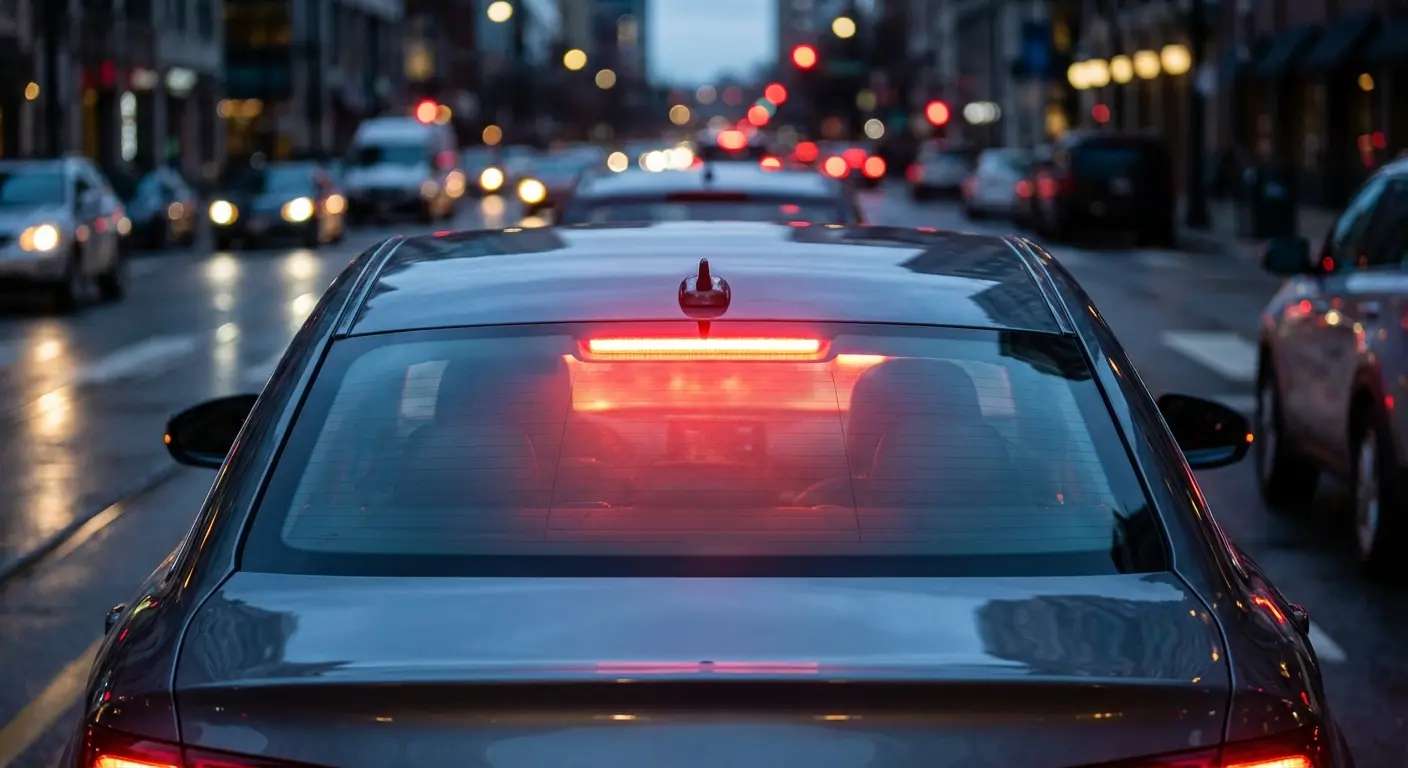
The third brake light sits centered at the rear of your vehicle, mounted higher than your standard tail lights. The government calls it the Center High-Mounted Stop Lamp, or CHMSL (pronounced “chimsel” by people who say it out loud, which isn’t many). It illuminates only when you press the brake pedal.
The design isn’t random. Positioning the light at eye level for following drivers creates a triangle pattern with the lower brake lights. That geometry gives the driver behind you a faster visual cue that you’re slowing down. The higher placement also stays visible when a truck or SUV blocks the view of your regular tail lights.
NHTSA mandated the CHMSL for all passenger cars starting with the 1986 model year. Light trucks and vans followed in 1994. The requirement falls under Federal Motor Vehicle Safety Standard 108, which governs all vehicle lighting. Before the mandate, studies on San Francisco taxi cabs showed rear-end collisions dropped significantly when the extra light was added. The federal data confirmed it: the CHMSL works.
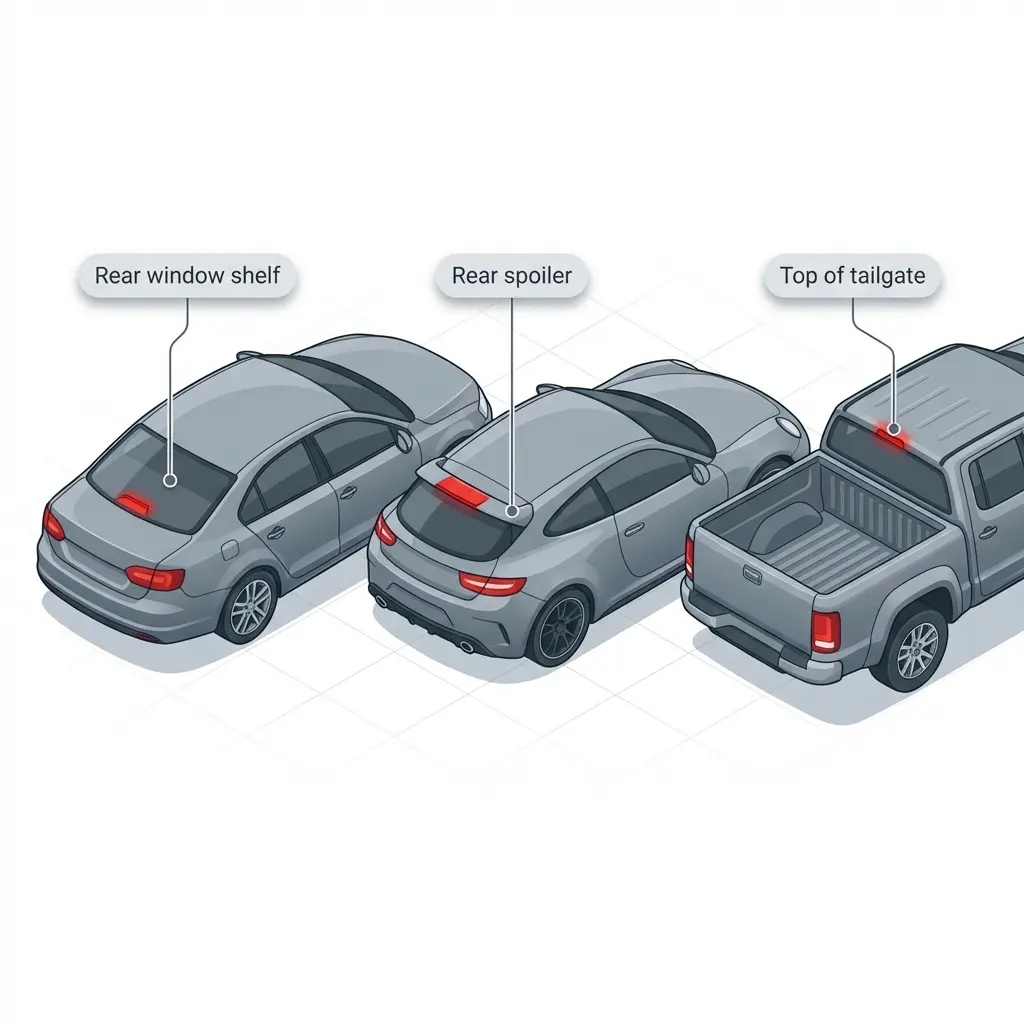
Most vehicles mount the third brake light in one of three locations: the rear window shelf (sedans), the rear spoiler (hatchbacks and sports cars), or the top of the tailgate (trucks and SUVs). The housing typically contains either a traditional incandescent bulb or an integrated LED assembly. Some units also include cargo lights that illuminate when you open the trunk or tailgate.
Is a Third Brake Light Required by Law
Federal law requires every passenger vehicle manufactured after September 1985 to have a functioning CHMSL. The rule applies to light trucks built after 1993. The regulation specifies that the lamp must display a steady red light when the service brakes are applied. Flashing third brake lights violate FMVSS 108, though some aftermarket units flash briefly before going steady.
Here’s the part that catches people: if your vehicle came with a third brake light from the factory, it must work. The federal requirement isn’t just about having the light installed. It must function. A burned-out CHMSL is a defect under federal standards.
State enforcement varies, and regulations can change over time. As of early 2026, Texas requires the third brake light to be visible, unobscured, and properly illuminated. A tinted or covered CHMSL fails inspection there. New York mandates functionality for all vehicles 1987 and newer. Virginia references federal DOT standards but doesn’t allow traffic stops solely for a non-working CHMSL. You can still fail inspection, though. Always verify current requirements with your state’s DMV or a local inspection station, as these rules may be updated.
The practical answer: if your third brake light is out, you risk a ticket, a failed safety inspection, or both. Some states treat it as an equipment violation. Others write fix-it tickets. Either way, the fix costs less than the fine.
Can you drive with the third brake light out? Legally, in most jurisdictions, no. Safely, you’re reducing your visibility to following traffic. The light exists because it prevents collisions. Driving without it isn’t worth the risk.
Common Third Brake Light Problems
When the third brake light stops working, the cause falls into one of four categories: blown fuse, burned-out bulb, bad wiring, or faulty brake light switch. I’ve seen all four in the shop. The troubleshooting order matters.
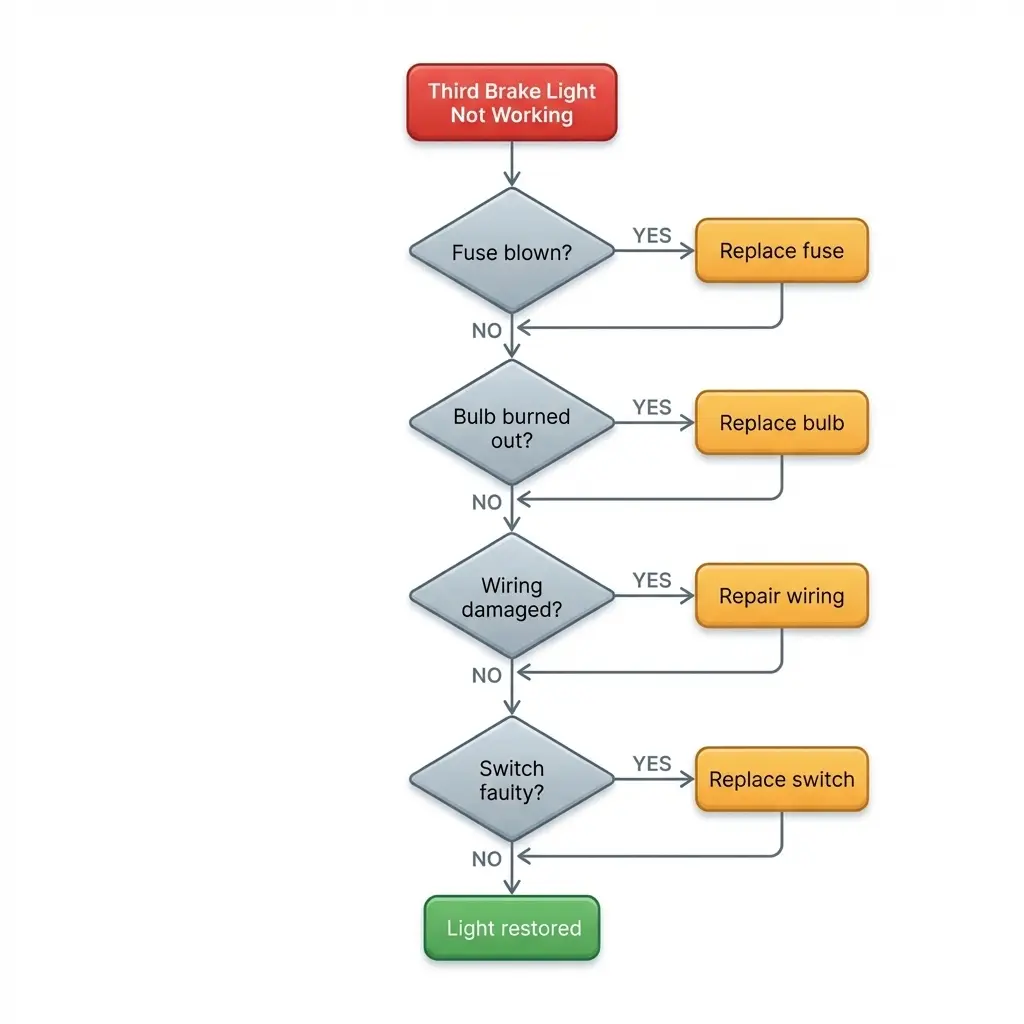
Start with the fuse. The CHMSL often shares a fuse with other brake lights, but on some vehicles it has a dedicated circuit. Check your owner’s manual for the fuse location. With the ignition off, pull the fuse and inspect it. A broken filament or discolored glass means it’s blown. Replace it with the same amperage rating. Typical replacement fuses cost a few dollars at any auto parts store.
If the fuse blows again immediately, you have a short circuit. Bare wiring contacting the vehicle body somewhere in the harness causes this. Finding shorts takes time. The wiring runs from the brake light switch at the pedal, through the body, and up to the CHMSL housing. Look for pinched or chafed wiring at hinge points, especially on hatchbacks and SUVs where the tailgate flexes.
Check the bulb next. Access varies by vehicle. Some housings have external screws. Others require removing interior trim panels. Once you have the bulb out, look for a broken filament or blackened glass. Incandescent bulbs eventually fail from heat cycling. A replacement bulb typically runs five to fifteen dollars at most parts stores.
The brake light switch sits near the brake pedal. It’s a two-wire switch that closes when you press the pedal. If your third brake light doesn’t work but your lower brake lights do, the switch probably isn’t the issue (they share the circuit). But if all three brake lights fail, test the switch. With the ignition on but engine off, use a test light to check for power on both terminals when the pedal is pressed. A replacement switch generally costs twenty to sixty dollars depending on the vehicle.
Wiring and connector issues round out the list. Corrosion at the bulb socket prevents good contact. The connector at the CHMSL housing can work loose from vibration. On older vehicles, water intrusion causes oxidation inside the housing. Applying dielectric grease to connections during reassembly helps prevent future corrosion.
Total repair cost varies by cause. A fuse costs a few dollars. A bulb runs five to fifteen. A brake light switch ranges from twenty to sixty depending on the vehicle. If you’re paying a shop for diagnosis and repair, expect roughly thirty to a hundred dollars for most third brake light issues. Complex wiring problems or hard-to-access assemblies can run higher.
How to Replace a Third Brake Light Bulb
Replacing the bulb yourself takes ten to twenty minutes on most vehicles, though some require more extensive trim removal that can add time. The hardest part is accessing the housing.
Before starting, ensure the vehicle is in Park, the ignition is off, and the keys are out. For extra safety on vehicles where you’ll be reaching into the trunk or cargo area, disconnect the negative battery terminal.
Step 1: Locate the access point. Check the owner’s manual. Sedans usually access the CHMSL through the trunk, behind a trim panel or cover. SUVs and hatchbacks often require removing interior panels in the cargo area. Some vehicles have external screws on the housing itself. Spoiler-mounted lights may require partial spoiler removal.
Step 2: Remove the housing or cover. Screws are common. Some housings use plastic clips that release with a firm pull. Work carefully. Cracking the housing or breaking clips means buying a replacement assembly. A plastic trim removal tool helps avoid damage.
Step 3: Disconnect the wiring. There’s usually a clip or tab securing the connector. Press the release and pull straight back. Don’t yank the wires.
Step 4: Remove the old bulb. Most third brake lights use a twist-lock socket. Turn it counterclockwise and pull. The bulb then pulls straight out of the socket. Note the bulb number (stamped on the base or listed in your manual) for the replacement. Common bulb numbers include 921, 912, and 194, but always verify for your specific vehicle.
Step 5: Install the new bulb. Push the new bulb into the socket. Don’t touch the glass with bare fingers if it’s a halogen type. Oils from your skin create hot spots that shorten bulb life. Reinstall the socket with a clockwise twist until it locks.
Step 6: Test before reassembly. Have someone press the brake pedal while you verify the light works. Reconnect the housing, secure all fasteners, and replace any trim panels. Reconnect the battery terminal if you disconnected it.
If you’re working on a vehicle with an integrated LED unit, you can’t replace just the bulb. The entire assembly comes out as one piece. LED assemblies typically cost forty to one hundred fifty dollars but rarely fail within the vehicle’s lifespan.
For related brake light work, the guide on how to change a brake light covers the lower tail light bulbs with similar step-by-step detail.
LED vs Incandescent Third Brake Lights
The original equipment third brake light in most vehicles uses an incandescent bulb. Newer vehicles increasingly come with factory LED units. Aftermarket LED replacements exist for older vehicles too. The differences matter.
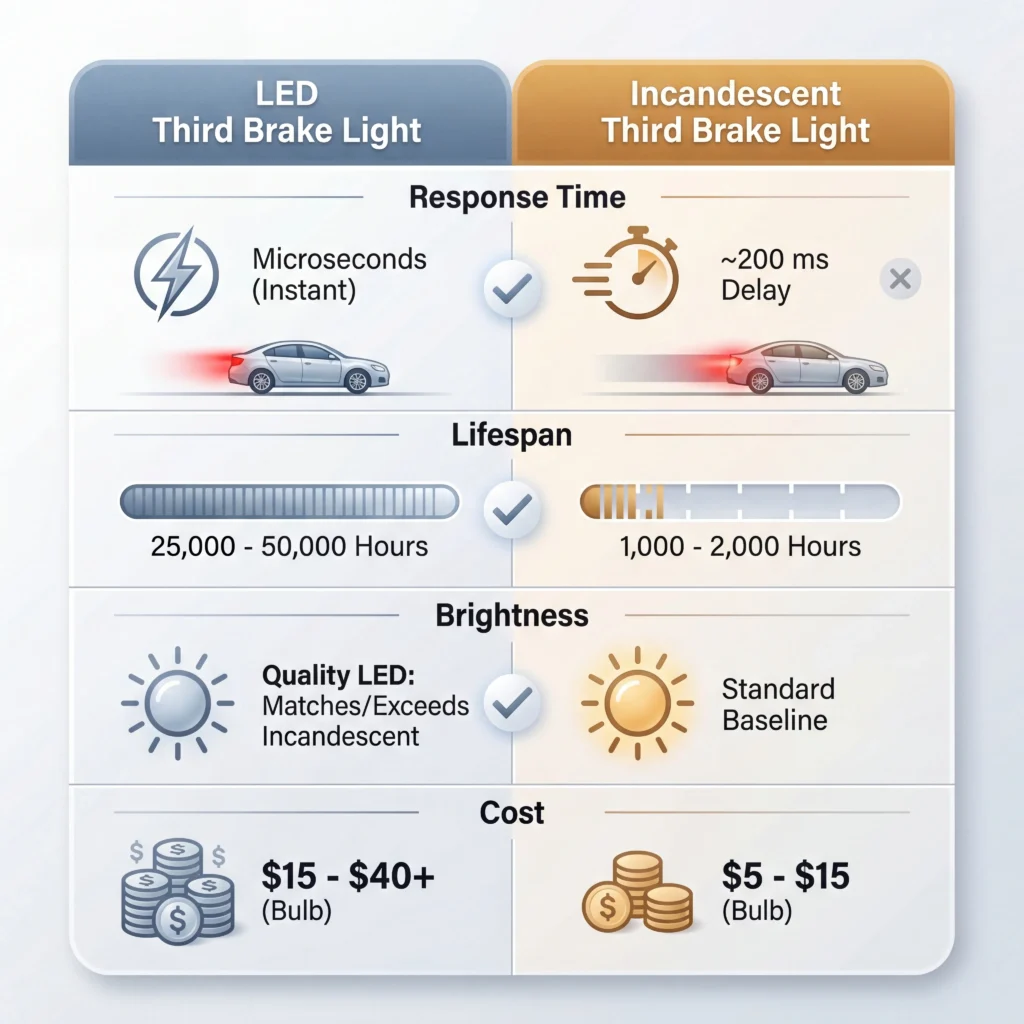
Response time: LED lights illuminate in microseconds. Incandescent bulbs take roughly 200 milliseconds to reach full brightness as the filament heats up. At highway speeds, that fraction of a second translates to several feet of stopping distance for the driver behind you. LED lights give following traffic an earlier warning.
Lifespan: A standard incandescent brake light bulb lasts roughly 1,000 to 2,000 hours of use. That translates to two to five years for most drivers. LED assemblies last 25,000 to 50,000 hours. You’ll likely never replace an LED third brake light during normal ownership.
Brightness: Quality LED replacements match or exceed incandescent brightness. Cheap LED bulbs sometimes underperform, especially in housings designed for incandescent bulbs where the reflector geometry matters. OEM LED units are designed as complete systems and typically outperform converted incandescent setups.
Cost: An incandescent replacement bulb runs five to fifteen dollars. A drop-in LED bulb replacement costs fifteen to forty. A complete LED assembly (if your vehicle allows it) runs forty to one hundred fifty. The math favors LED if you’re keeping the vehicle long-term.
Compatibility and hyperflash: Not all vehicles accept LED bulb swaps directly. Because LEDs draw less current than incandescent bulbs, your vehicle’s computer may interpret the lower draw as a burned-out bulb. This can trigger “hyperflash” (rapid blinking) or dashboard warnings. Some LED conversions require load resistors to simulate the electrical draw of an incandescent bulb. Check compatibility for your specific vehicle before buying, and factor in the cost of resistors if needed.
If you’re replacing a burned-out incandescent bulb and the housing is in good shape, an LED conversion makes sense for the safety and longevity benefits, provided you address any hyperflash issues. If the original LED assembly failed (uncommon but not impossible), replacement with OEM is usually the only option.
Understanding the difference between your third brake light and standard tail lights helps with troubleshooting. The tail light vs brake light comparison breaks down how these circuits differ.
What You Should Do Next
The third brake light is mandatory equipment that directly reduces rear-end collisions. If yours is out, fix it. The repair is straightforward for most vehicles, and the parts cost less than a traffic ticket.
Check the fuse first. Then the bulb. Then the wiring and switch if needed. If you’re upgrading to LED, verify compatibility with your vehicle’s electrical system and be prepared to add load resistors if you encounter hyperflash.
For a complete view of brake system maintenance covering drums, calipers, warning lights, and pedal issues, the Brake Drums guide connects all the pieces.
Know the spec, follow the procedure, and don’t skip steps.
— Garrett Stowe
